Tired of filling out the same Advanced Search fields every day to find the group of styles you’re working on? Ready to save some time? Say hello to Saved Filters!!! 🥳
| Info |
|---|
Note that if you do not see the Saved Filters area on master folder search screens in your BeProduct environment, it will need to be enabled by an Administrator. |
Introduction to the Saved Filters Panel
...
From your search page, click on the Saved Filters dropdown and select +New Filter.
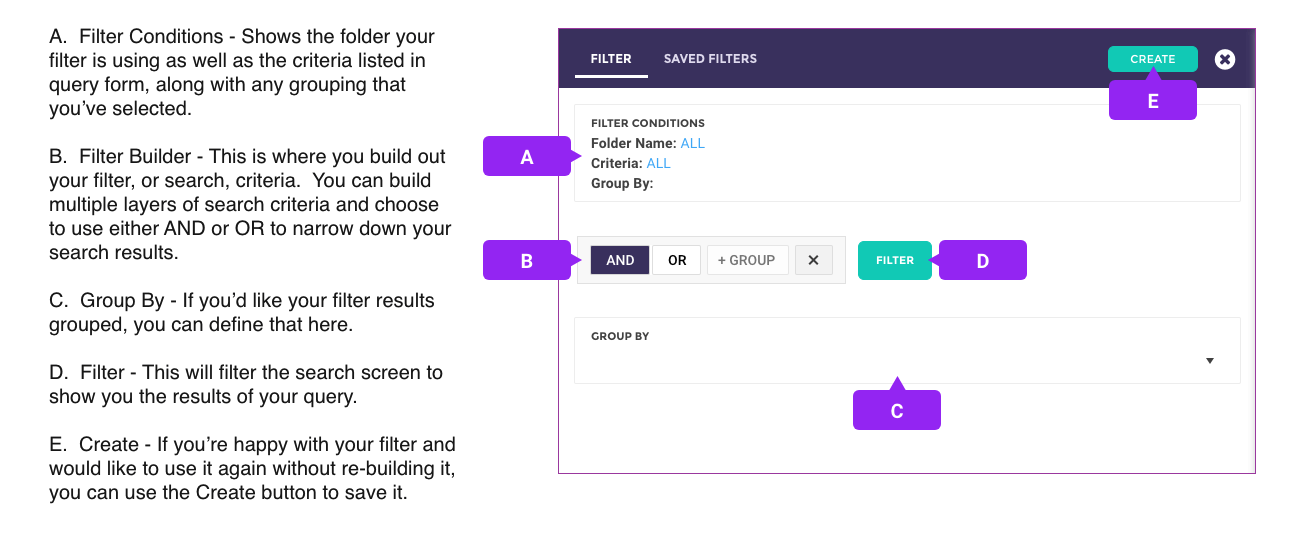
A panel will appear on the right-side of the screen. Here’s a breakdown of all the controls (click to enlarge):
| Info |
|---|
Note that if you do not see the Saved Filters area on master folder search screens in your BeProduct environment, it will need to be enabled by an Administrator. |
Building a Filter
Click on the +GROUP button. Notice a new line is added to the query builder.
Next, click on the +FIELD button. You can now use the first dropdown to select which field you’d like to search, the middle to further define the scope of your search, and the last dropdown to enter what you’d like to search for.
In this example, I’m searching for any styles that have a Header Name (Style Name) containing “Tee.”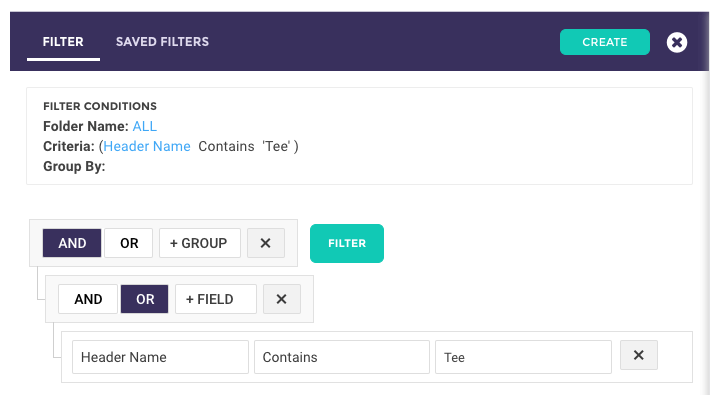
Notice how the Criteria line in the filter conditions updates with the search conditions entered.
Let’s expand our search a bit. Click on the +FIELD button again to add another line.
In the new line that appears, add additional search criteria. In my example, I’ve added an additional line searching for Header Names containing “Robot.”
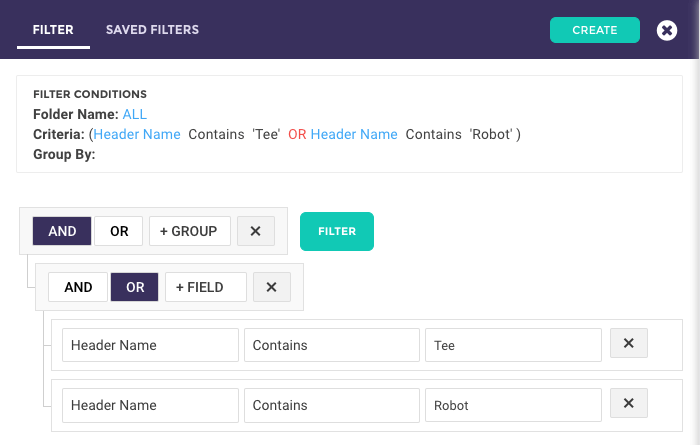
Since the OR button is highlighted for the group of fields I’m working with, my search results will show me styles that have “Tee” or “Robot” in the name.
...