This article will walk you through the steps needed to install BeProduct Sync on a Mac.
| Info |
|---|
BeProduct Sync uses a rendering engine called GhostScript in order to render images for use in BeProduct. In order for BeProduct Sync to work properly, you must have GhostScript installed on your machine. You can download GhostScript here. After downloading, run the installation file and follow the prompts to complete installation. |
Installing the BeProduct Sync Application
Click on the following link to download BeProduct Sync for Mac. https://sync.beproduct.com/PROD/mac/BeProductSyncInstaller.dmg Download BeProduct Sync here.
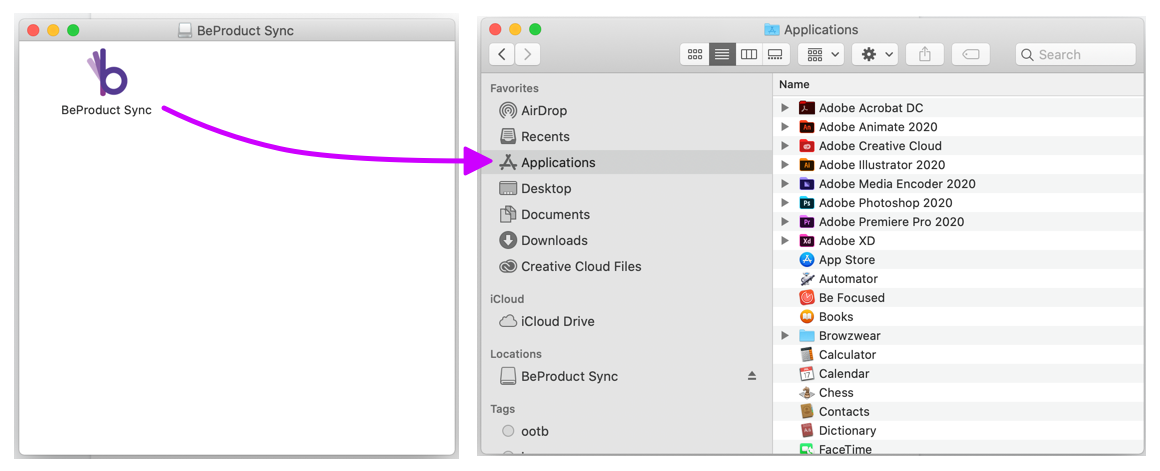
Once the installer file has downloaded, double click on the BeProductSyncInstaller.dmg file in your downloads folder on your machine.
A new Finder window will open with the BeProduct Sync App. Drag and drop the App into your Applications Folder on your Mac. (Note that if you have previously installed BeProduct Sync, you’ll receive a popup--choose the Replace option.)
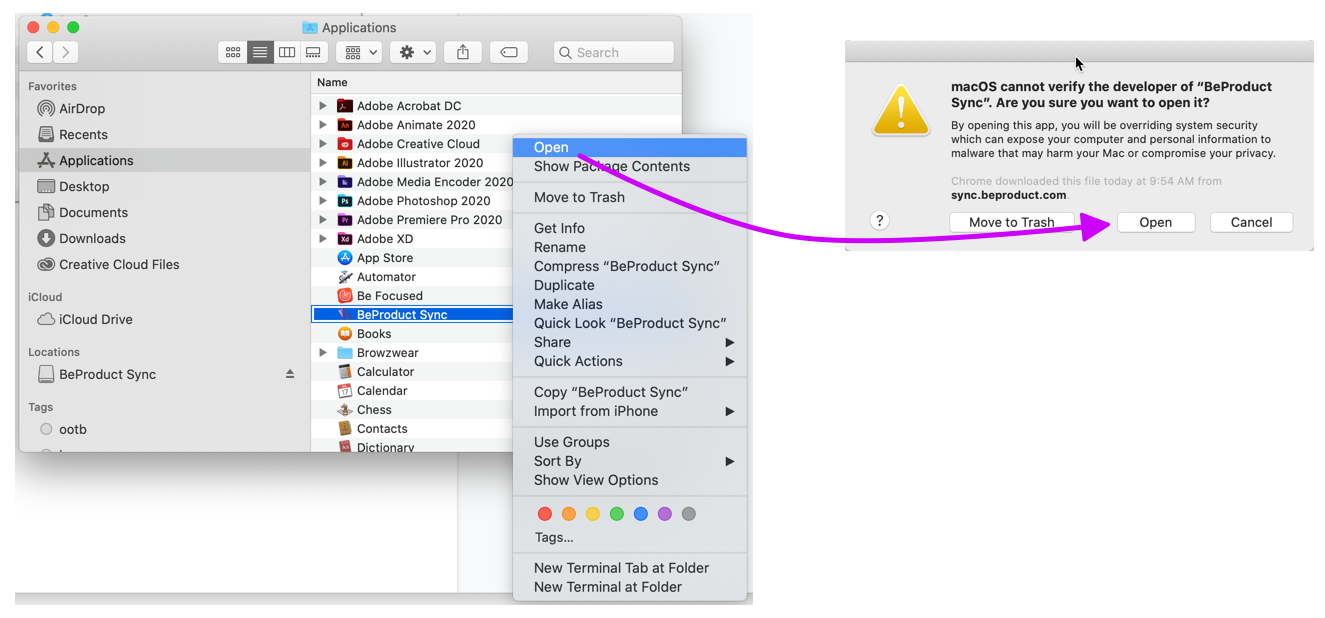
In your Applications folder, right-click or Ctrl+Click on the BeProduct Sync App, select Open and when prompted, select Open in the popup menu.
You’ll now see the BeProduct Sync App in the MacOS Menu Bar at the top of the screen. Application installed--nice job!

Setting up the BeProduct Sync App
...
Now that you have BeProduct Sync installed and open, we can set it up. Click on the BeProduct Sync icon in your menu bar at the top of the screen and in the menu that opens, click on the Log In button.
A log in page will open in your default browser. Log in with your BeProduct credentials and read through the Terms & Conditions, then click the Accept button.
Return to the BeProduct Sync app icon in the system menu bar and click on the gear icon to go to the settings page. In the BeProduct Sync Server Address dropdown, select the second option. You will know you have selected the correct option if the Server Settings field begins with smb://.
Click the Save button. You’re all done setting up the BeProduct Sync App--next, we’ll set up Sync in BeProduct itself and then you’ll be all set!
Setting up the BeProduct Sync in BeProduct
Now that we’ve got the BeProduct Sync Application all set up, we’ll set up BeProduct itself to work with Sync and you’ll be ready to roll. First, log into BeProduct in your web browser (as always, Chrome is best for this).
Navigate to the Style folder and click on the BeProduct Sync Cloud icon. Select the first option in the dropdown and in the following screen click on the Log In button.
You’ll be taken to a Winks.io login page. Enter your BeProduct credentials and log in.
Return to BeProduct and click on the BeProduct Sync cloud upload icon in the Style folder. Click on the Drive icon to mount the Sync folder and after a short time, a new Finder window will appear for you to drag and drop files into for upload into BeProduct.
You’re all done! Log Into BeProduct and navigate to the Image folder’s search screen. (If you do not have access to the Image folder, you can also use the Material or Style search screens for this step.
Select the Sync icon in BeProduct at the top of the screen.
In the dropdown in the Sync menu, select Sync2.0.
Once the menu refreshes, select the Login button.
Follow prompts to log in and then close the tab in your browser once a message says to do so.
Return to the Image Folder search screen and open the Sync menu.
Click the drive icon that says “Click here to open folder”
A Finder window should appear titled Image.
You’re all done! You can now drag or paste images into the finder window to upload into BeProduct. We hope you enjoy BeProduct Sync!
...


